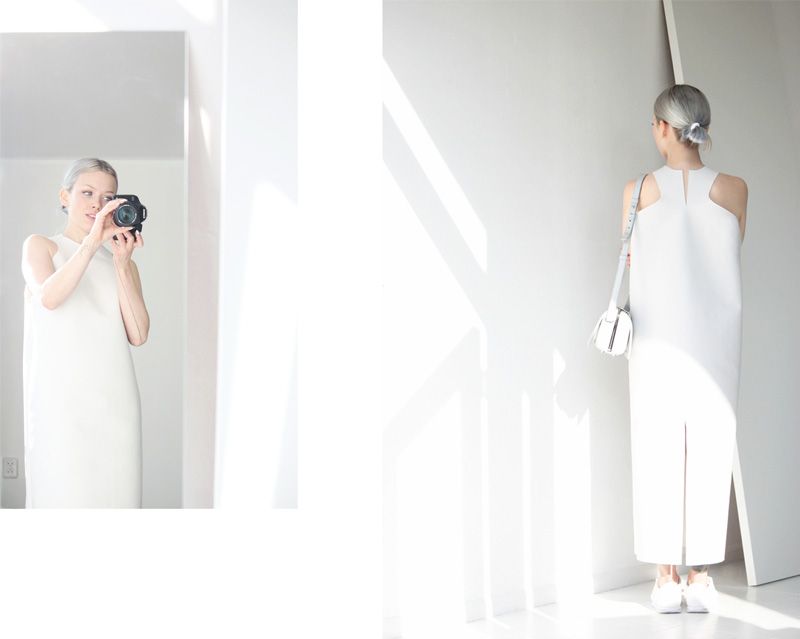
May 23, 2013

L I F E / Go to - items

 photo loveaestheticsgoto-2.jpg

jeans: Cheap Monday
leather top: DIY
scent: Maison Martin Margiela


I'm sure you've seen these items around more than once here on Love Aesthetics.
That's because I always run to them, they always work, never let me down.
The leather top is so stiff that it automatically always sits well and looks structured and polished. And though jeans are definitely not my favorite piece of clothing, the schizophrenic Dutch weather dictates that it is often the best option - like today - when the weather consists of alternating rain, bright sun and hail. It's not laziness that makes me grab the same thing over and over again, it is because I found clothes in which I feel most like myself,
the urge to have a dress up experiment isn't something I have every single morning anymore.

May 21, 2013

DIY | Clear Bag With Copper Handles

 photo loveaestheticsDIYcopperclear01.jpg

 photo loveaestheticsDIYcopperclear02.jpg


 photo loveaestheticsDIYcopperclear03.jpg


 photo loveaestheticsDIYclearcopper04.jpg

Put a copper plumbing tube and a bit of plastic together and you'll get a bag!
A nice clear rectangle with copper handles, a combination of two of my absolute favorite materials.
Have fun making one and don't forget to show me a snapshot on instagram!

/ two copper tubes
/ plastic
/ sewing machine or needle and thread

01/ Take measurements. Decide how large you want your bag to be. Mine was 40cm (width) x 30cm (height).
Because plastic seams can rip easily, I decided not to put a seam on the bottom. So instead of cutting two rectangles of 40cm x 30cm,
cut one large rectangle of 40 cm x 60cm and fold it in half, don't forget to add a few centimeters for the tubes, the final measurements of the plastic would be approximately 40cm x 65cm.
02/ Fold the plastic in half and cut out a square in the middle, where your hand is going to go through.
03/ Fold over the four flaps left on the top and sew creating four 'loops' where the tubes will go through. Make sure they are tight enough so that the tubes won't slip out.
04/ Close the bag with a seam on each side, not making it go all the way up to leave a bit of room to open and close the bag.
05/ Put the tubes through the loops (don't worry about their weight, they are actually super light!) and it's finished!

May 17, 2013

OUTFITS | Charlie's Coat

 photo loveaestheticscharliescoatweb.jpg

 photo loveaestheticscharliescoat00.jpg

tee: Hema
jeans: Cheap Monday
trainers: white painted thrifted
coat: borrowed Charlie May

I got mail from Charlie last week! She knows how much I love her work and was so sweet to let me wear it.
Had a quick meet-up with her in Antwerp during the sample sales last month, but we got too caught up in drinking Belgian beer, eating Belgian fries and going through the racks
of the Ann Demeulemeester and Haider Ackermann(where unlike everyone else, I ended up buying nothing), that we never got around to picking up her garments at her hotel.
Oh well, the long, heavy silk, mint coat -one of my favorite pieces from her show last year- did make it to my house in the end!

May 14, 2013

ACCESSORIES | Matte White Magnetic Jewelry Set


magnetic bracelet: found it here
magnetic necklace: here


Confession: I have a weakness for accessories. And almost every month end up purchasing a new piece.
This time I fell for this set in white coated metal with magnetic closures. I had seen an identical minty green version of these at COS, but the color put me off.
Though I've got to be honest; a part of me feels guilty about bringing these non-investments into my collection, another part really loves them.
Oh, and you can also create one long necklace by connecting the bracelet and necklace together.

May 12, 2013

OUTFITS | Long Coat + Short Short


shorts: thrifted Adidas
coat: made by me
tee: Hema
shoes: courtesy of Tibi
bag: 3.1 Phillip Lim

I'm always amazed about how year after year thrift stores, vintage boutiques and seconhand markets have an endless supply of these Adidas running shorts from the 70s and 80s.
Every single person in the world must have owned a few back then, because the current vintage stock doesn't seem to be running out any time soon.
I got mine last spring and the funny thing about them is that the label inside still says it 'made in West-Germany'.
Besides using them for their intended purpose; running, they also get worn on lazier days. Their place in my wardrobe isn't in the workout-gear drawer but among the regular shorts and skirts.

May 11, 2013

LIFE | Twenty-Five


Hello again May 11! The second half of my twenties has started. I certainly feel that clock ticking.
Not because I dislike getting old, but it makes you realize there is a time limit on everything.

May 08, 2013

BEAUTY | Marble Manicure


I have a little obsession going on with marble lately, specially in objects around the home. I love how luxurious yet natural it is.
Last week I tried out a marble pattern out on my nails. It took a bit of experimenting, but I got it down after a few tries.
Having it only on a couple of nails keeps it subtle and not too decadent.


Marble Nails
/ white nail polish
/ light grey nail polish (I didn't have light grey so I blended a bit of white and dark grey together)
/ dark grey nail polish
/ topcoat nail polish
/ thin nail art brush (or if you don't have that like me, an old nail polish brush from which you can cut half of the hairs.)


01/ Coat your nails with white polish
02/ With the thin brush apply the first veins with a bit of a zig zag motion, it doesn't matter if it turns out sloppy. See second picture.
Keep an image of actual marble close to use as a reference to guide you when shaping the veins.
03/ When the light grey 'draft' of the marble has dried, trace these lines with the dark grey polish, like shown in the third picture.
Just let your brush go along the light grey lines. These thinner dark grey lines will add a lot of depth to your marble.
04/ When the darker veins are almost dry, apply a layer of shiny topcoat to make it all blend together.
That's it!

May 07, 2013

NOVELTY | Harim Jung, Mini Interview


Photography, Dominik Tarabanski
Set Design, Zu Sb
Fashion Design, Harim Jung
Makeup, Francisca Saavedra
Hairstyle, Takayoshi Tsukisawa

Yesterday I stumbled upon these gorgeous images made by Polish photographer Dominik Tarabanski.
But what struck me the most were the designs by Parsons student Harim Jung. Specially the techniques she used to build her clothes is incredibly exciting: the technical way she deconstructed the
garments and worked with the patterns, layering them , leaving them loose from the rest of the garment and then applying beautiful luxe finishings like a metal gold strip.
It even reminded me a bit of the dress with layered patterns from Hussein Chalayan.
Harim has been selected as one of the 14 Parsons student for the Empowering Imagination competition, I'm keeping my fingers crossed for her!


/Update
Managed to contact Harim Jung (thank you anonymous for leaving a link to her website!) and she was so kind to answer a few questions:

/Can you please tell me a bit about the fabrics and materials that you used?
My inspiration first started from my high school uniform so I wanted the fabrics to carry the essence of it. The navy pieces were mainly wool fabrics, where as the white pieces were mainly cotton resembling the white shirt of the uniform. The brass is an additional element that comes from my experience back in high school where we couldn't wear any accessories due to the school's policy, so I designed the brass to accessorize the clothes rather than the body.

/What are your plans after graduation?
I would love to continue with my own work at the same time I am open to experiencing any opportunities that come in my way!


/In the style.com interview you mentioned that you'd like keep your garments accessible, how do you do that, do you keep functionality in mind a lot when designing?
Because the entire process of my thesis was very experimental, I didn't want to make clothes that people had a hard time wearing. The collection was about sharing my story, my memories, yet providing an experience for the wearer to create their own and interpret the pieces in their own way. I also focused on creating pieces for anyone to wear and have access to. Ultimately the goal was to to find a happy medium between the creativity and the accessibility